Well that took forever :/ I'm kinda mad at myself for putting it off as long as I did, but it's finally finished. So the challenge was to use my Gypsy Wanderings Cartridge and birthday theme paper to create a fairy tale inspired birthday invitation. I originally had an idea in my mind and had it all planned out, but, as per usual, when I started the project everything changed.
Anyway, I ended up making a cute little invitation with just the word 'party' on it but the 't' in 'party' had a crown above it. I used pink paper to make a shadow of the word to put behind it and teal paper with lighter colored stars on it for the actual word. I used my Gypsy along with my Cricut to cut the words out which allowed me to copy the word 'party' and maneuver it so just cut the crown was cut out because I didn't want the word and the crown to be all one color. And what fun is a princess crown if it's not gold?!? Once I had them all placed where I wanted them using my Gypsy, I put paper on my mat, loaded it in the Cricut and cut them all out. This is one of the best things about using the Gypsy with your Cricut. You can place multiple images to be cut out and see exactly where they will be on the mat when you go to cut them out. This allows you to put multiple pieces of paper on your mat and not waste whole sheets of paper (see image below). After I cut out the word, I assembled my card. I used kraft cardstock as my base and a scrap of paper that had cakes and party hats on it for my background. I cut the paper to fit the card almost exactly and then tore it diagonally so that some of the kraft was showing. Then I attached the paper to the base with my Elmer's Adhesive Runner. (I love this stuff!) Then it was time to attach the words to the card. I put the shadow base down where I wanted it to go, but before I attached the actual word, I cut the crown off. This allowed me to use the yellowish one without having to layer it over the teal. I adhered that to the pink base and then adhered my yellow crown where I cut the other one off of. And that is that. My card is complete. All in all, it took me about 20 minutes to complete. Most of that time was spent fiddling with the image on my Gypsy and then cutting it out. The assembly was actually pretty quick and easy.
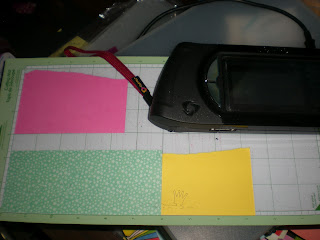 |
My Gypsy and my Cricut mat with the multiple pieces of paper for the different cuts
|
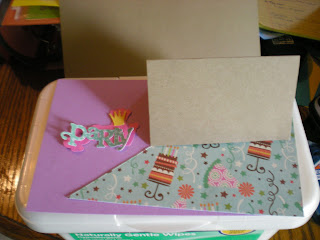 |
| All the pieces I used to assemble the invitation |
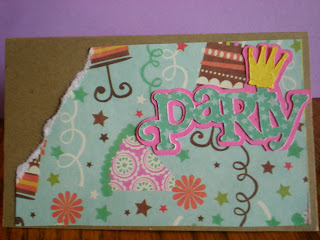 |
| Completed Invitation! |
That's all for this post. I hope that makes sense. If it doesn't, feel free to comment with questions. I will write again when I receive my new challenge *hint hint Artie...*


Well done! You should have taken it all the way though and made one to an imaginary party :)
ReplyDelete